
Easy hair bow instructions for girls
Posted by Shannon on Jul 29th 2015
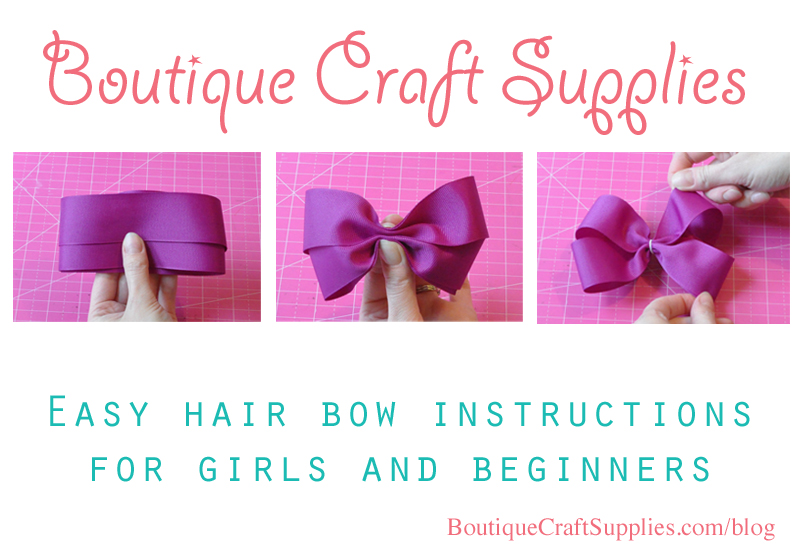
My 11 year old daughter and I worked together to come up with the easiest hair bow instructions ever. Folding a hair bow can be a lot harder than it looks, so we tried several different bow shapes until we found the simplest fold that even young girls can be successful at. If you're planning a hair bow making birthday party for your little girl, are looking for a fun activity to do at a baby shower, or have just never made a hair bow before and want detailed step-by-step instructions, this tutorial is for you.
These hair bow instructions are basically a modified, easier, version of my pinwheel hair bow. You can see a pic of my pinwheel baby bow on my hair bow website, Fleurette Accessories. I call this modified bow the Easy Ribbon Wrapped bow because the ribbon is just wrapped around and around itself. No need to angle the loops or struggle to get them perfectly even.
You can find all the grosgrain ribbon you need to make this hair bow in my store, Boutique Craft Supplies. I have several printed ribbon hair bow kits that are perfect for your hair bow making party or if you're just learning how to make bows yourself, these kits give you plenty of ribbon to experiment with.
In these instructions, I show you how to tie up a bow with elastic cord (available at any sewing shop, like Joann's) because this cord is easiest for little fingers to grab hold of and tie. If you want your bows to be thinner through the center, use a thinner cord, thread, or sew them. I'll give more details about sewing your bows at the end of this tutorial.
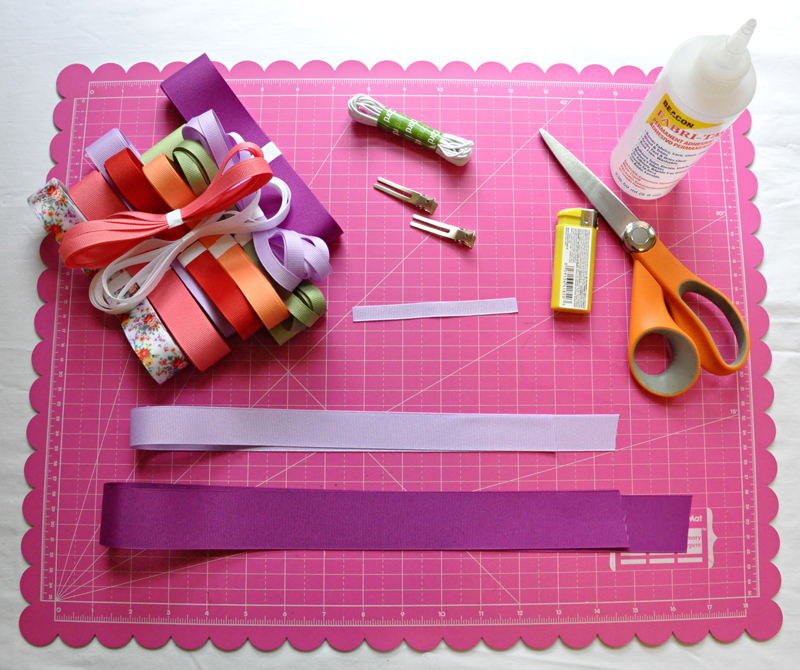
Supplies needed
Grosgrain ribbon kit, shown is ribbon from my Floral Fantasy ribbon kit
Elastic cord
Alligator clip
Scissors
Lighter
Fabri-Tac (optional)
Hot glue gun
Ruler
Ribbon measurements:
Shown in this tutorial is a 4.5” bow made with 1.5” ribbon cut to 29”.
In part 2 of these instructions we'll make a 4” bow made with 7/8” ribbon cut to 24”
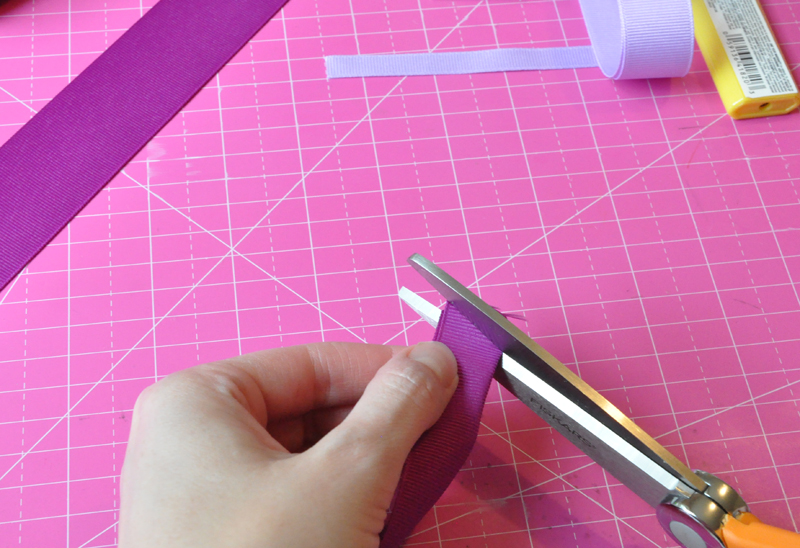
Start by V-cutting your ribbon ends. Fold your ribbon in half and cut at the angle shown.
__
When you unfold your ribbon each end will look like a V. Run a lighter, quickly, close to the edge of the ribbon to melt and seal the ends. This will keep your ribbon from fraying. Be careful, ribbon is flammable! Do not let kids do this step, obviously lol.
__
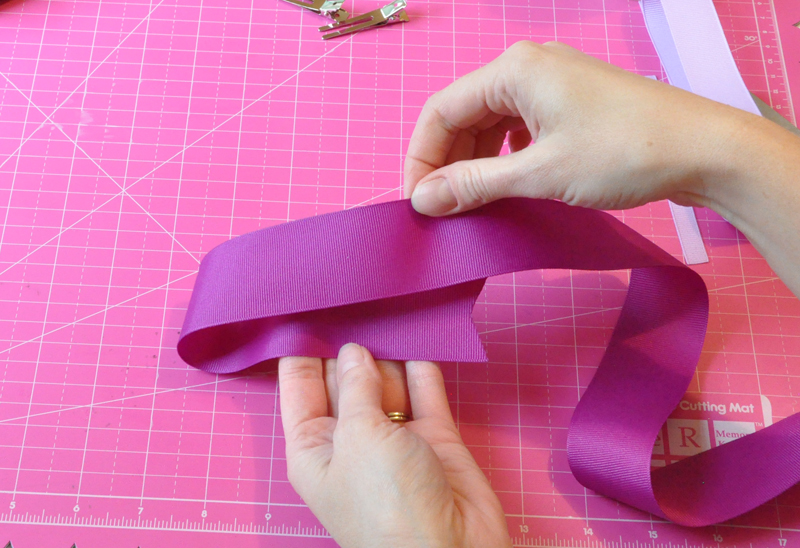
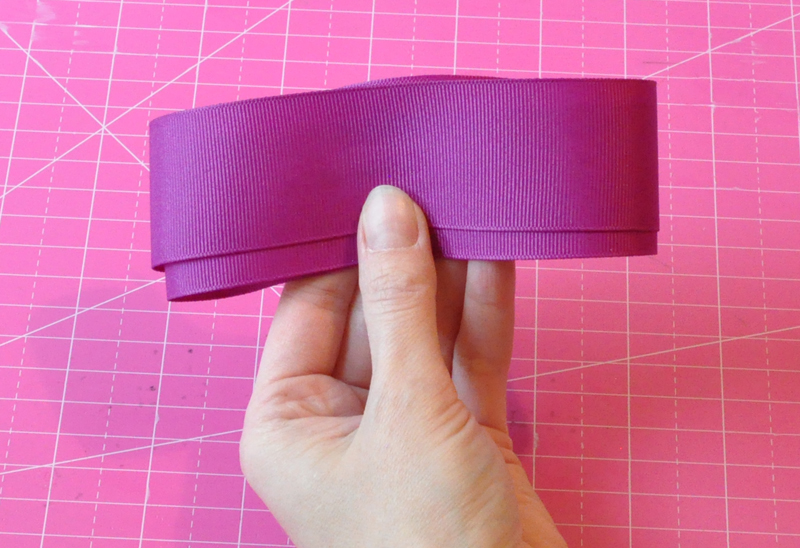
Now we'll begin the Easy Ribbon Wrapped bow fold. Start with the end of your ribbon pointing to the right and fold the long end over and on top. You want the end tip of the ribbon to the first fold to measure about 4.5".
__
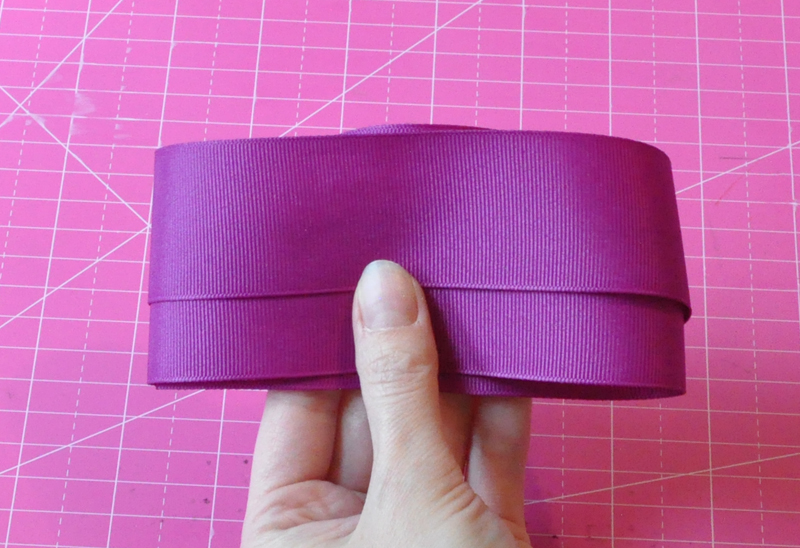
Wrap the long end of your ribbon back to the left behind your first fold.
__
This is what it looks like on the inside so far. The ribbon is just wrapped around itself, nothing fancy.
__
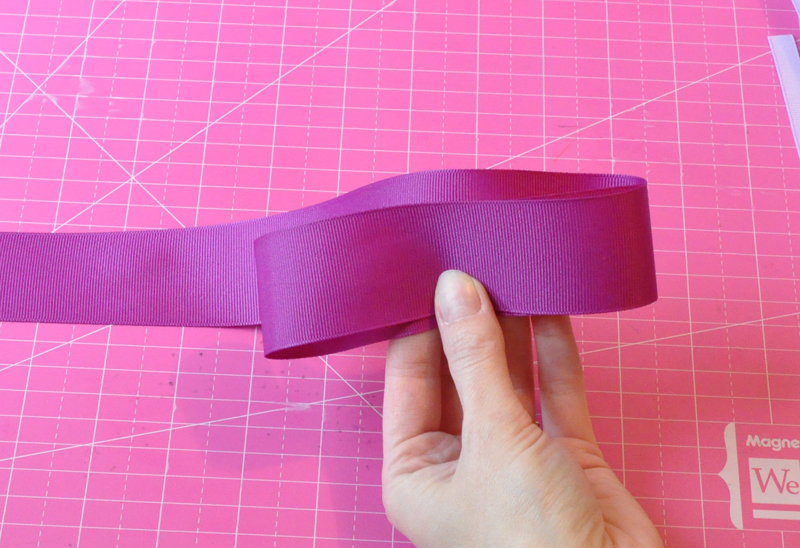
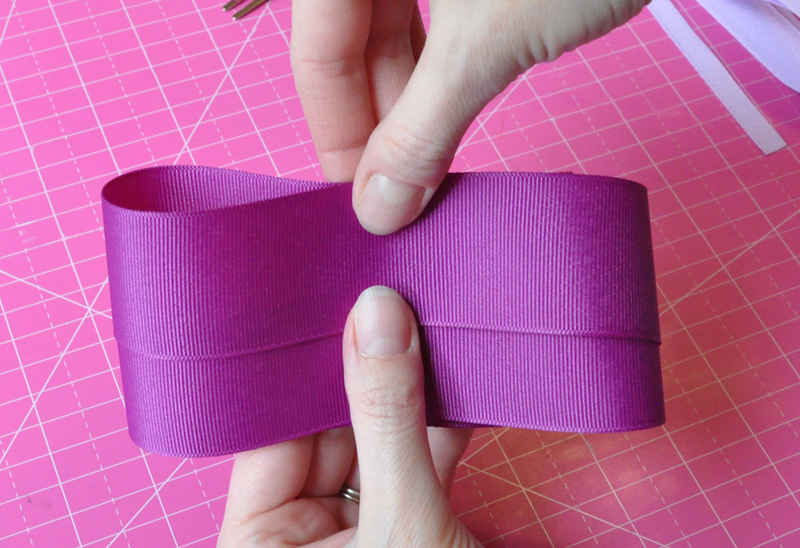
Wrap the long end of your ribbon back across to the right and in front of the other layers.
__
Finally, wrap the long end back to the left, behind all the other layers.
__
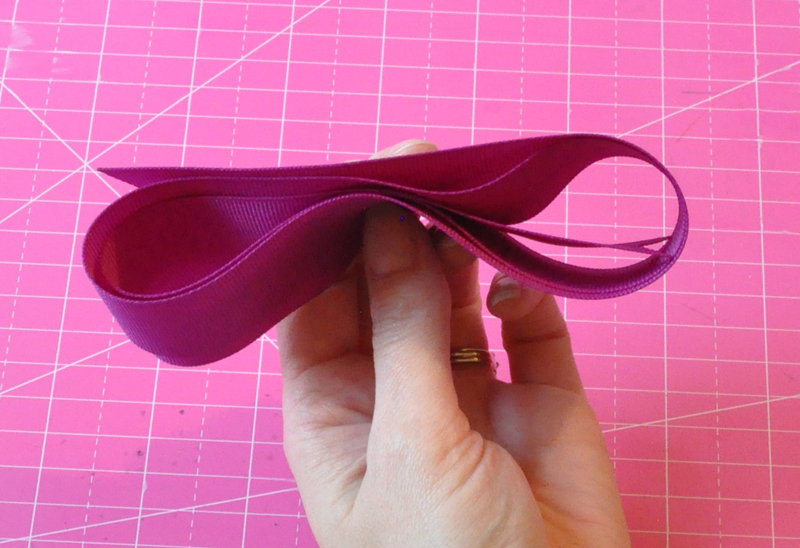
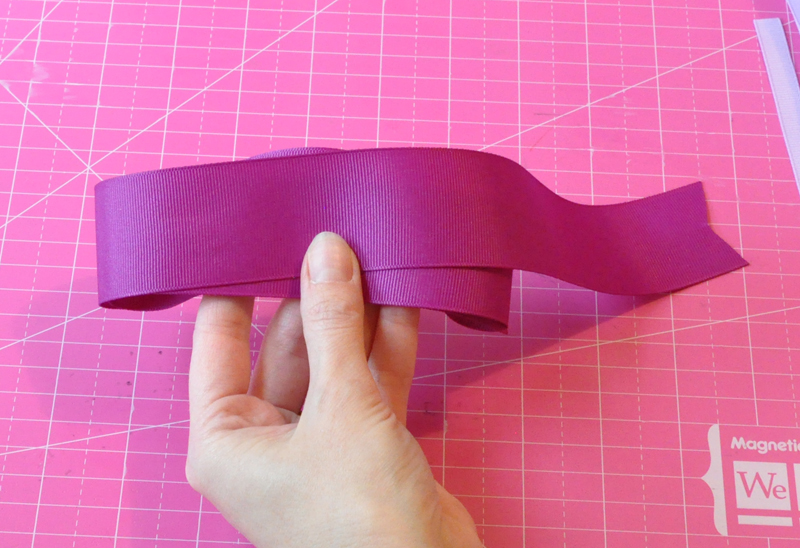
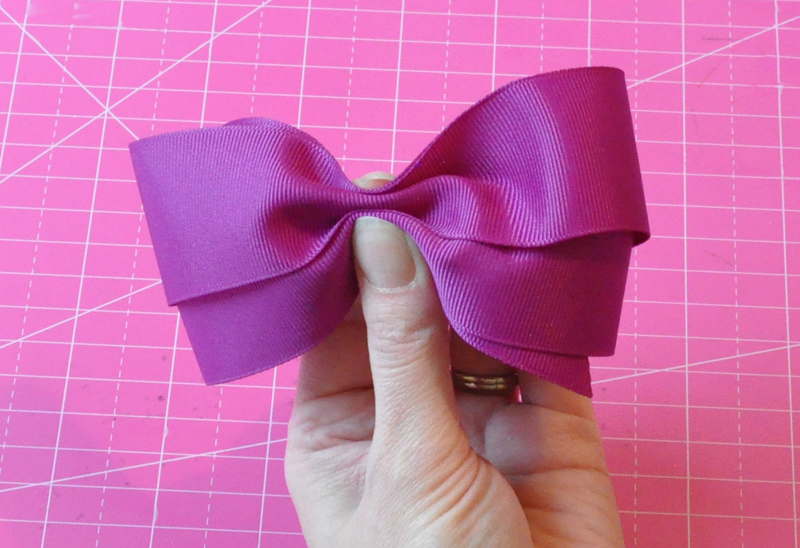
This is what it looks like on the inside. Your ribbon is just wrapped around itself as if you were rolling it up to put it away in a drawer, there are no fancy twists. The key is to look down at your ribbon and see two loops of ribbon and one end piece on each side. If your final end piece ended up a little short and is sitting closer to the center of your bow, just roll the whole bow a little to the right until your left end piece lines up with the edge of the bow as shown above.
__
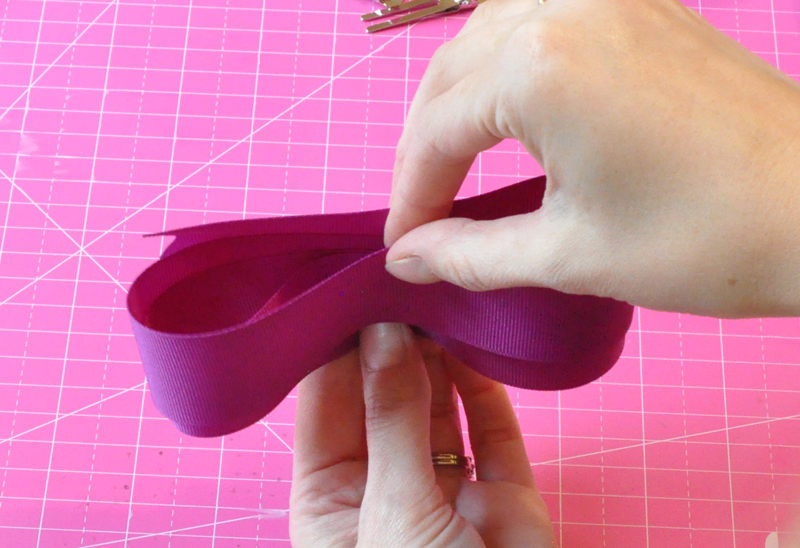
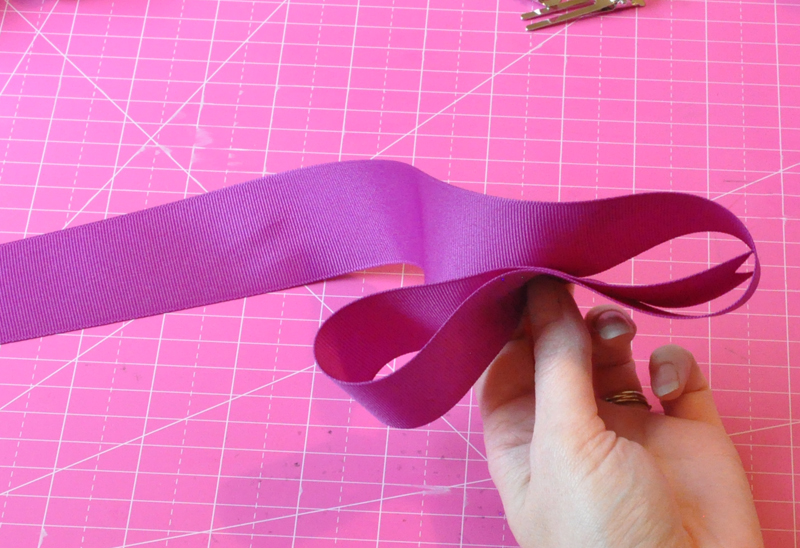
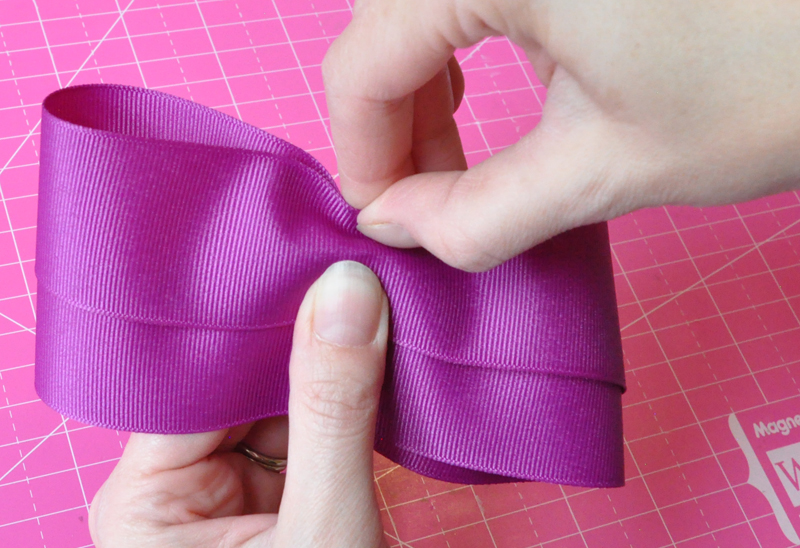
Now we're going to change this stack of ribbon into a bow. With the tips of your fingers grab the very front and very back layers and pull them up just a bit to separate them from the other layers of ribbon.
__
This is what it looks like after the layers are separated. You only move the front and back pieces of ribbon up just a bit until they reveal about half the width of the ribbon underneath.
__
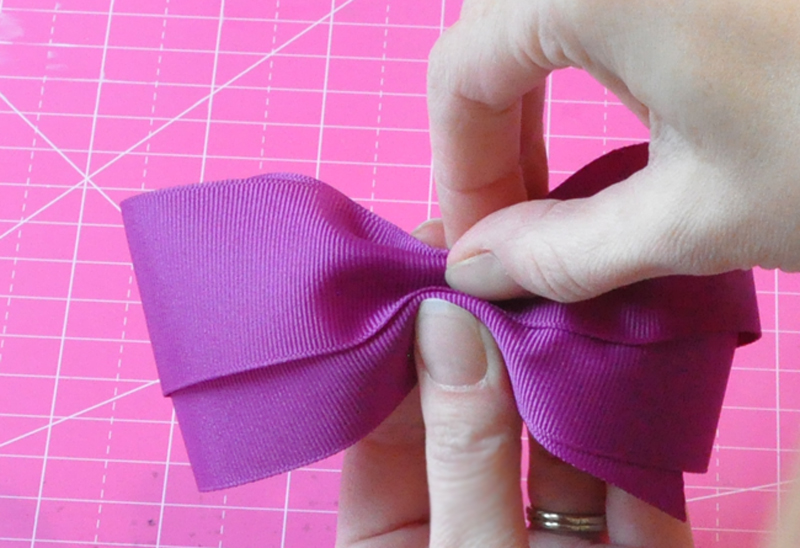
Now is the tricky part, the center fold. The center fold makes or breaks the bow, and it is difficult at first. If you're having a party with younger girls making bows, you may want some teens or adults on hand to help out with this step.
The first important thing to know is you need your hands in the right place. All your fingers should be holding the bow from behind and both thumbs are in front pointed towards each other.
__
Start the center crease by folding the top edge of the ribbon towards yourself. As you're doing this, push up with your left thumb creating a crease.
__
This is what the first crease in your center fold looks like.
__
Now hold the top crease with your right thumb and first finger while pushing up, making a second crease with the left thumb.
__
Here's your bow with two center creases.
__
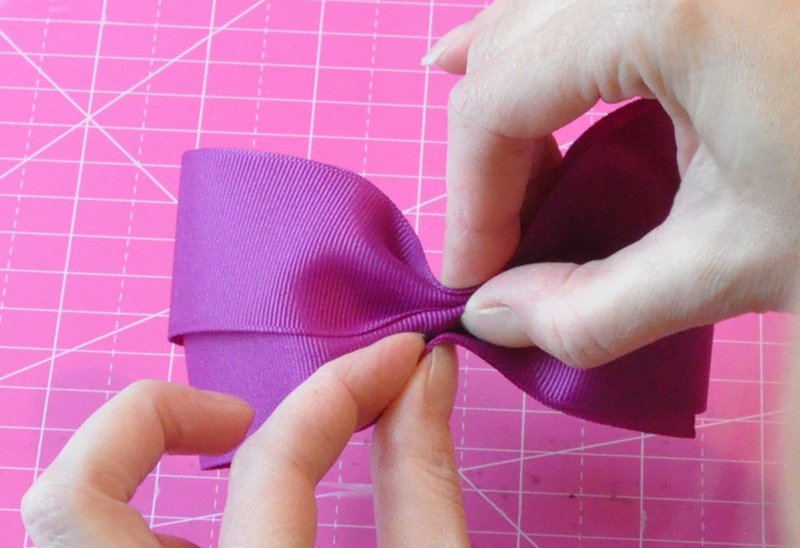
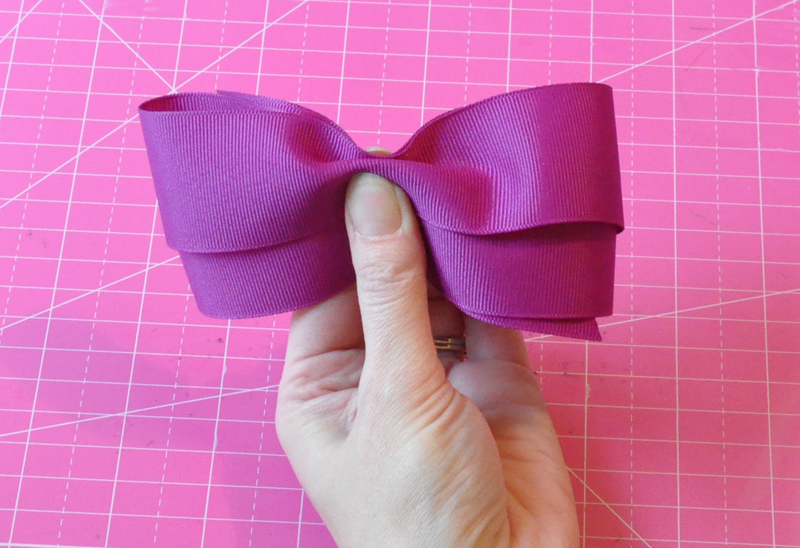
Now if you have enough ribbon left, fold that bottom edge up and towards yourself.
__
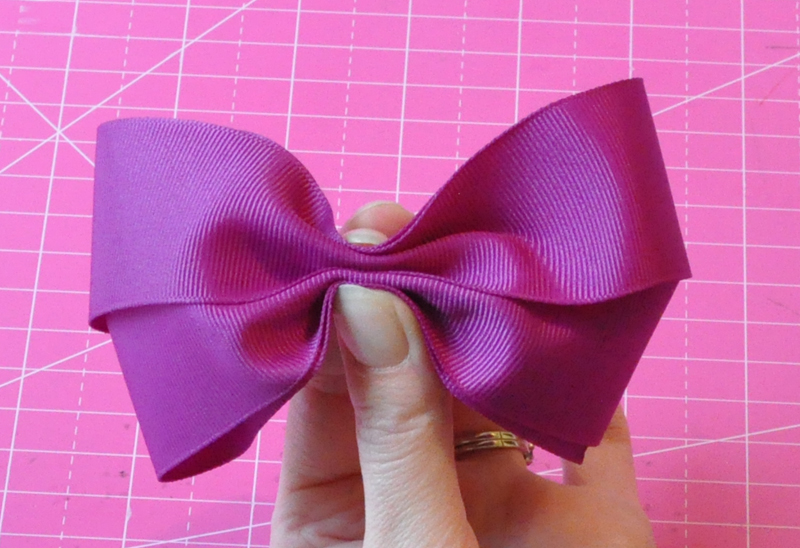
This is your bow with the center fold complete. It can be pretty difficult to fold a bow with two creases in the center. If it's not working for you feel free to just fold one crease with the top and bottom edges folded forward.
__

Now flip your bow so the back of the bow faces you, careful not to let go of your center fold! Wrap a piece of elastic around the center.
__
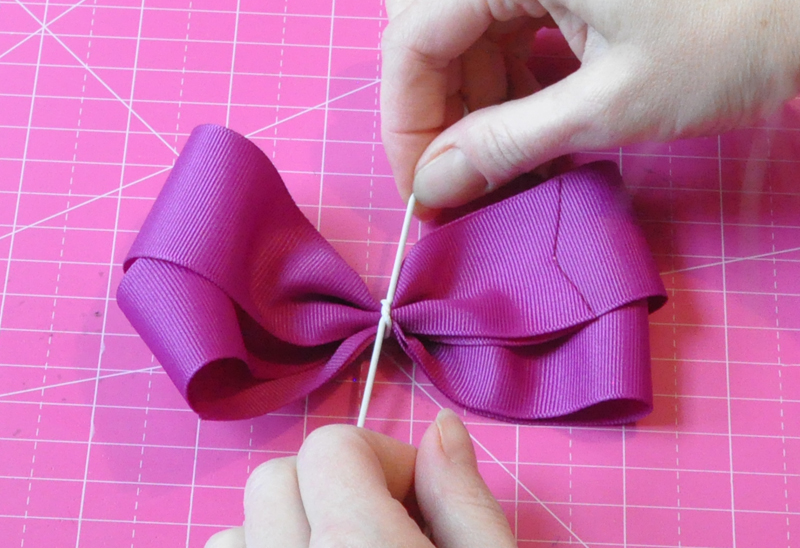
Tie your elastic in a standard knot. If you're working alone you may need to pull one end with your teeth lol.
__
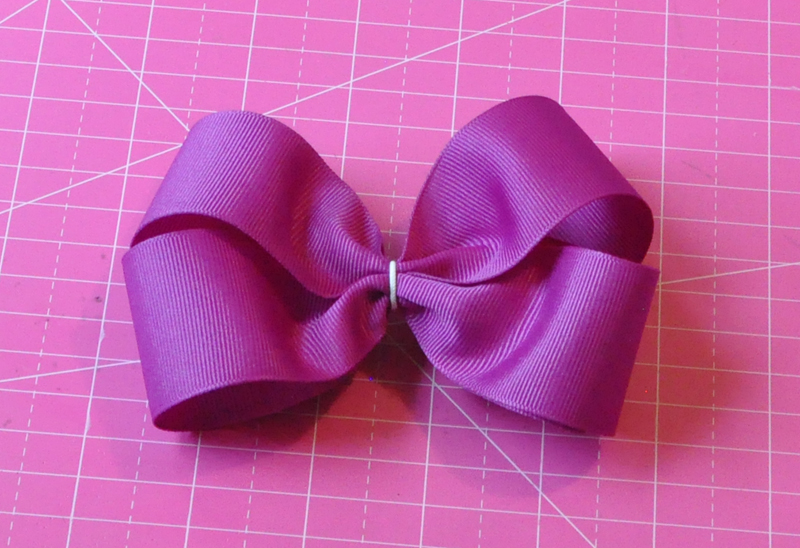
Double knot your elastic and cut the ends short.
__
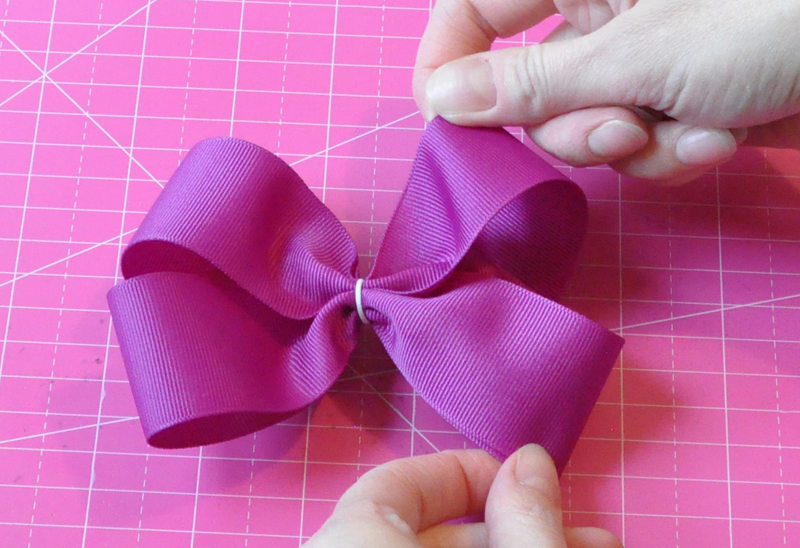
Flip your bow back to the front and fluff. You fluff up the bow by pulling the top and bottom loops a little bit apart.
__
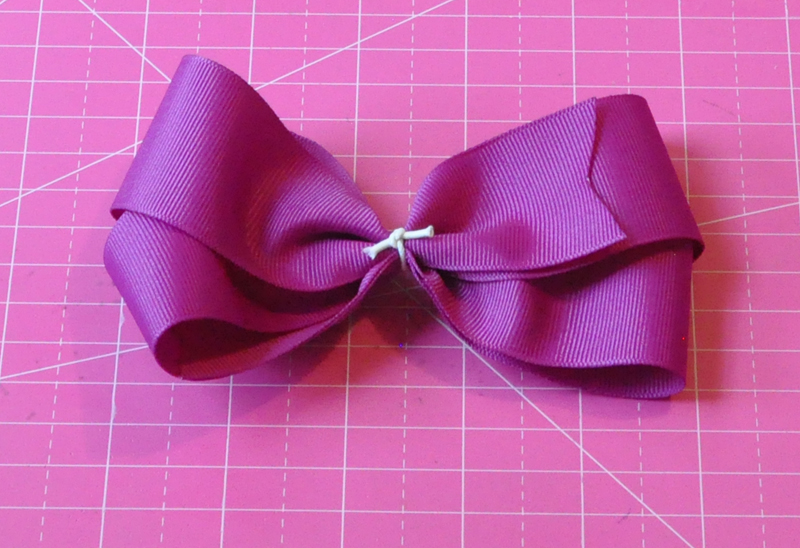
Here's our completed Easy Wrapped Ribbon bow. To finish off the bow just hot glue an alligator clip to the back and cover the center with a flat piece of 3/8" ribbon or a knot of 5/8" ribbon.
Now if you find your bow too thick through the middle because of the elastic, I highly recommend sewing your bows instead. This is how I make all my hair bows. Wrap up your ribbon and separate the loops but before you start the center fold, stitch through the center of the bow a couple times with needle and thread. Let the thread hang loose in the back while you fold the center of the bow. Then, wrap the thread around the center fold several times, pull the thread very tight, tie and trim.
Good luck and happy bow making!
~Shannon